

Add Device flow
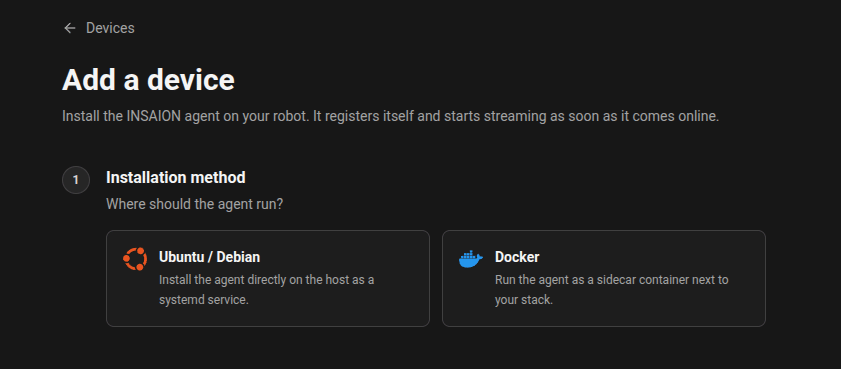
Devices → Add Device opens a single page. Choose how to install the agent, then everything else is on the same page — the install command updates live as you change options.1. Installation method
Choose where the agent will run:- Ubuntu / Debian: native install as a
systemdservice. - Docker: run as a container with the required host mounts and environment variables.
2. Enrollment key
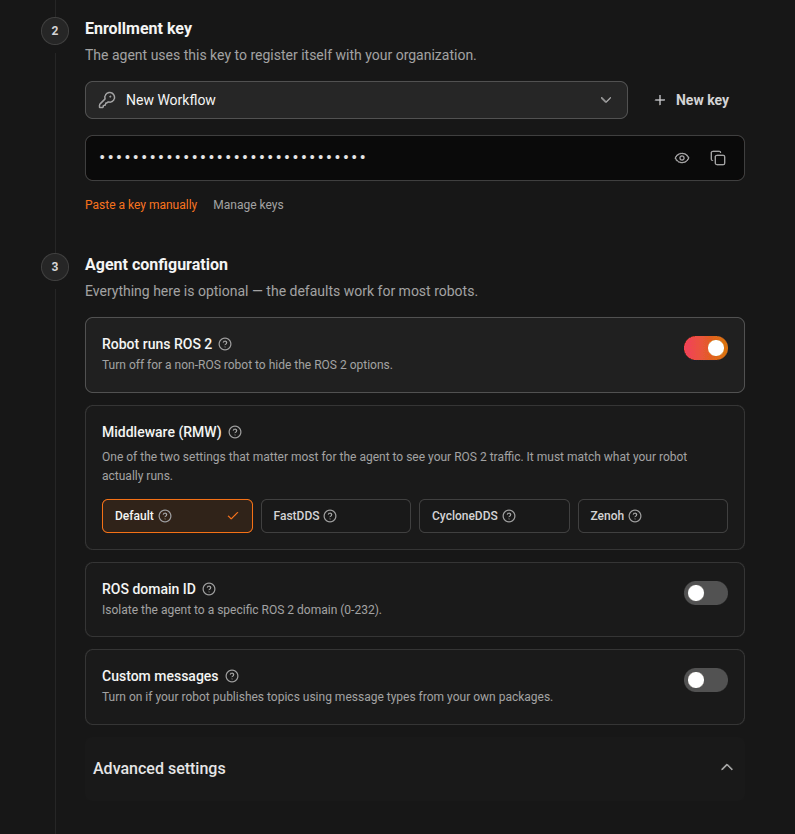
Pick one of your existing enrollment keys from the dropdown, or create a new one without leaving the page. The selected key is hidden by default; use the eye icon to reveal it and the copy icon to put it on your clipboard. If you keep your keys in a secrets manager, use Paste a key manually instead.3. Agent configuration
Every option is off by default — switch on only what your robot needs:- Custom ROS setup script (Ubuntu) or custom ROS workspace directory (Docker).
- Middleware (RMW): FastDDS, CycloneDDS, or Zenoh, each with its own settings.
- ROS domain ID, automatic discovery range, static peers, localhost-only mode.
- Docker only: the ROS 2 distribution used for the container image.
4. Install command
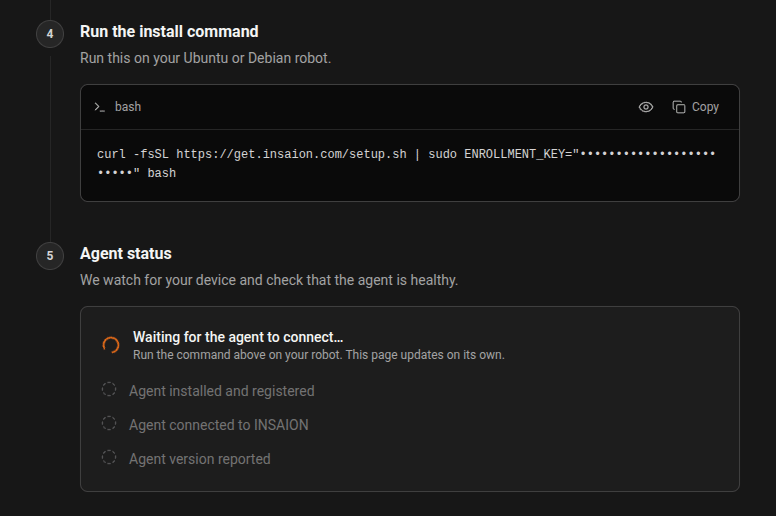
Copy the generated command and run it on the target machine. The enrollment key is masked on screen; copying always copies the real command.5. Agent status
The page then watches for your device and reports when the agent is healthy:- Agent installed and registered
- Agent connected to Insaion
- Agent version reported
- ROS topics discovered
Enrollment keys
Enrollment keys are persistent secrets managed under Settings → Enrollment Keys. They are designed for repeatable and bulk device registration — bootstrap scripts, golden images, container environments. Treat them like API keys: protect them, rotate them periodically, and name them so you can audit which batch of devices used which key. Keys are stored encrypted, so you can reveal an existing key at any time from Settings → Enrollment Keys or from the Add Device page. Keys created before this behaviour existed are shown as Created before keys could be shown and can only be replaced with a new key. Steps- In Devices → Add Device, select an existing enrollment key or create a new one.
- Copy the generated install command.
- Run the command on the target Linux machine.
- The installer writes the enrollment key to
/etc/default/insaion-agent, installs theinsaion-agentsystemd service, and starts it. - The agent uses the enrollment key to authenticate and register automatically. The device appears on the Devices page — and in the Agent status block on the Add Device page — shortly after.
Troubleshooting
- Enrollment key rejected: verify you copied the key exactly and that the key is still active (not revoked or expired).
- Automated install not registering: confirm the
ENROLLMENT_KEYis present in/etc/default/insaion-agentand that the device can reach the Insaion backend over the network. - Agent status never turns green: verify the service is running with
sudo systemctl status insaion-agentand that the device can reach the Insaion backend. - Check agent logs for detailed error messages about enrollment or connectivity with
sudo journalctl -u insaion-agent -f.
Security and lifecycle
- Treat enrollment keys like secrets. Store them in a secrets manager or environment variables that are not checked into source control.
- Rotate keys periodically and revoke keys that are no longer needed. After revocation, devices that registered with a revoked key will continue to operate normally; revocation prevents new enrollments with that key.
- Use descriptive names when creating keys so you can identify which deployment or image used each key.
Best practices
- Create one enrollment key per deployment, site, or image so you can tell which batch of devices used which key.
- Rotate keys periodically and revoke keys that are no longer needed.
- Limit distribution of keys, and revoke rather than share when a device leaves your control.
- Monitor and audit the Devices page and enrollment key usage regularly.