Log Management
The Log Management page provides a simple, user-focused interface to view, upload and manage recorded log files. It is designed to help you find the logs you need quickly, see key details at a glance, and take common actions such as visualizing, downloading or deleting logs.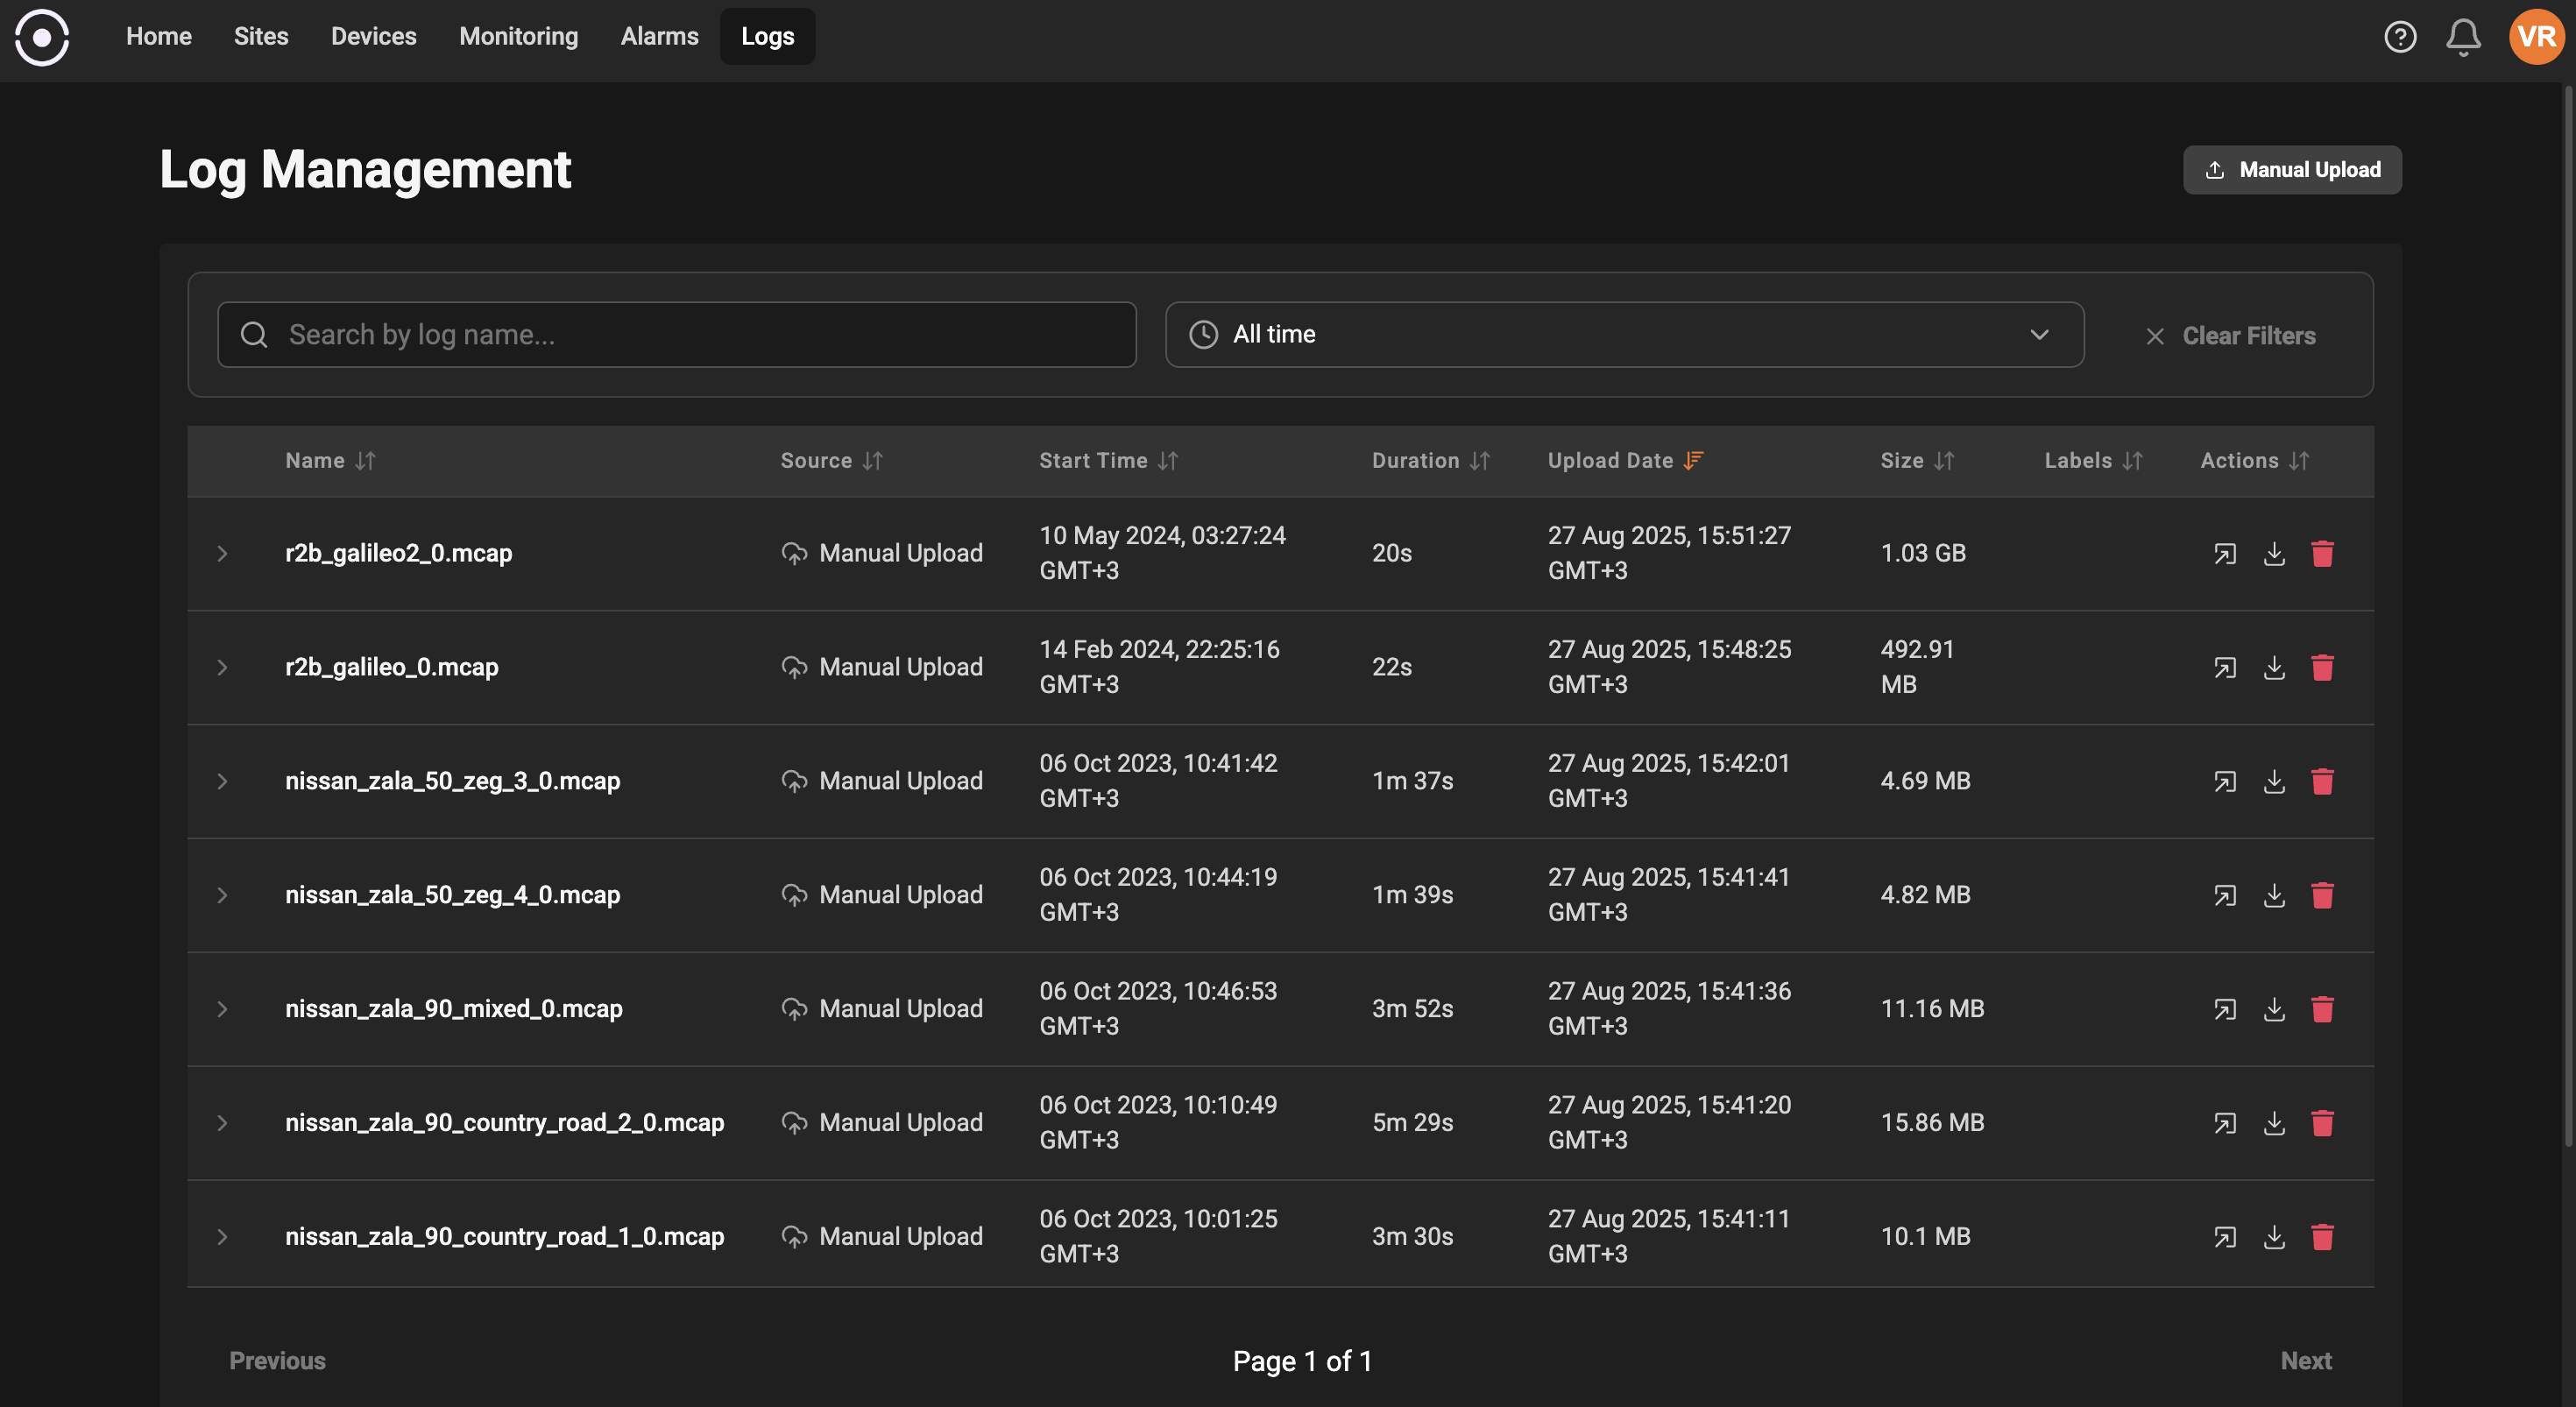
What you can do on this page
- Upload log files manually: Use the “Manual Upload” button to select and upload a log file from your computer. Uploaded logs will appear in the table and can be interacted with like device-generated logs.
- Search and filter: Use the search box to find logs by name. Use the time-range control to narrow results to recent logs or a specific date/time window.
- Browse logs: The main table lists logs with useful columns so you can quickly scan for the entries you need.
- View details and edit metadata: Click any log row to open the details sidebar where you can view read-only information and edit the log’s name, description and labels.
- Actions: Quickly visualize, download, or delete a log from the Actions column.
- Pagination: Move through pages of logs when you have many files.
Page layout and controls
- Header: Shows the page title and a compact “Manual Upload” action for adding a log file from your computer.
- Filters area: Contains the search field and time-range picker. Clear filters with the “Clear Filters” button.
-
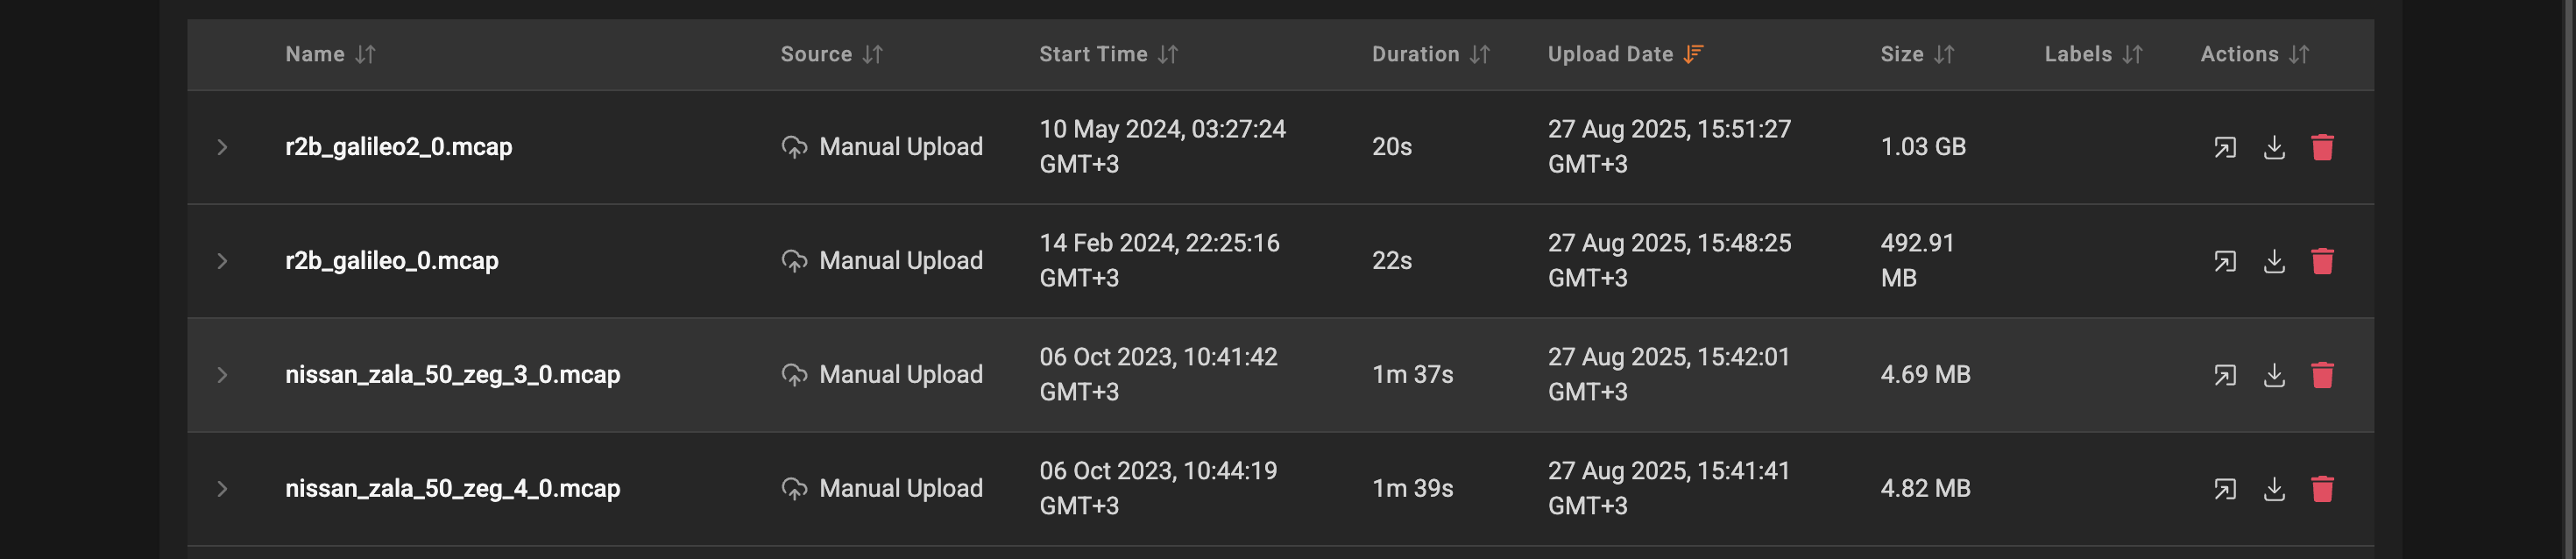
Logs table: Each row in the table represents one log file. The columns include:
- Name — A human-friendly name for the log. You can edit this in the details sidebar.
- Source — Where the log came from, either the device name or “Manual Upload”.
- Start Time — When the recording began.
- Duration — How long the recording lasted.
- Upload Date — When the file was uploaded to the system.
- Size — File size for quick assessment.
- Labels — Short tags that help you categorize logs. Click a label to edit it in the details sidebar.
- Actions — Quick buttons to visualize the log, download it, or delete it.
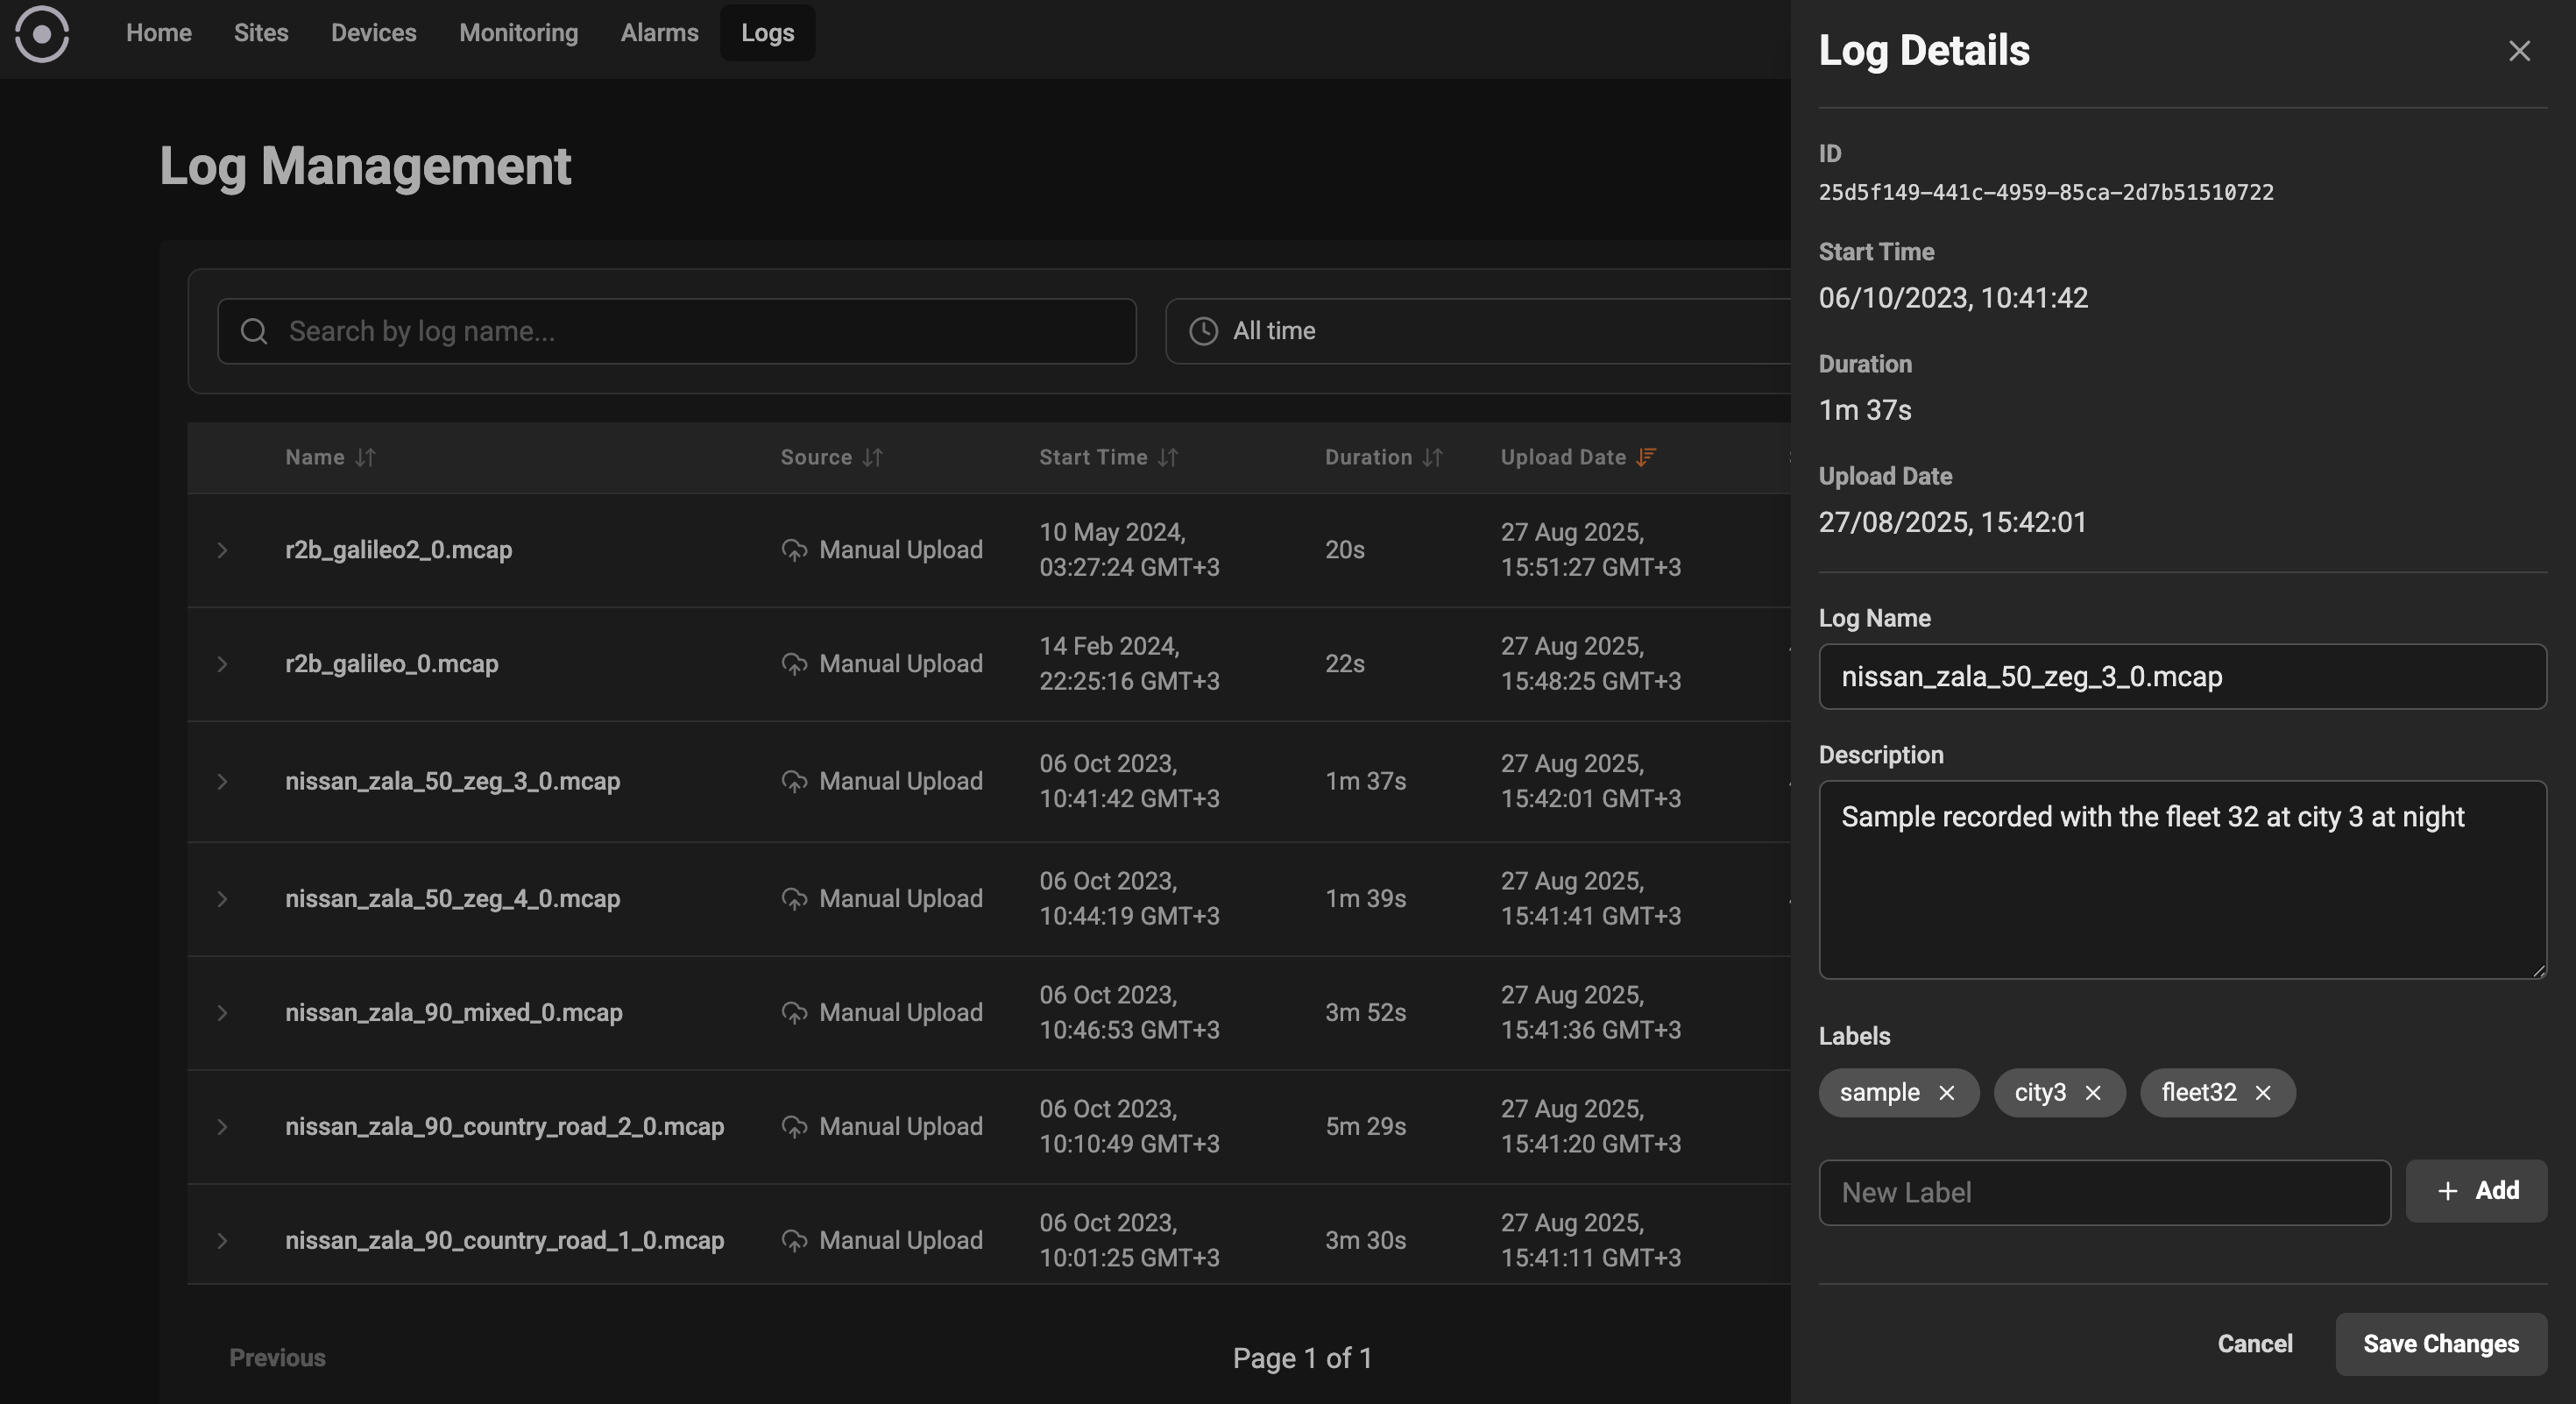
Details sidebar
When you select a log, a details panel slides in from the right with both read-only information and editable metadata:- Read-only information: ID, Start Time, Duration, Upload Date.
- Editable fields:
- Log Name — A required field. Friendly names make it easier to find logs later.
- Description — Optional notes about what the log contains.
- Labels — Short tags you can add, edit or remove. Labels help with filtering and organization.
Actions explained
- Visualize: Opens the log in the app’s visualization workspace so you can inspect topics and message streams.
- Download: Saves the original log file to your computer.
- Delete: Removes the log file from the system. You will be asked to confirm before deletion.
Searching and filtering tips
- Use the search box for partial matches on the log name. The search is case-insensitive.
- The time-range picker supports quick relative ranges (e.g., last 24 hours) and custom start/end ranges.
- Combine search and time filters to quickly narrow results.
Labels and organization
Labels are lightweight tags you can add to logs to organize them by project, test scenario, device, or any other category you find useful. Add multiple labels to a log, and use them together with the search and time filters to find what you need.Error and empty states
- If there are no logs to show, the page displays an empty state with a hint on how to upload or produce logs.
- If the app encounters a problem fetching logs, a clear error message is shown with guidance to retry or contact support.
Common workflows
- Quickly find a recent log: Pick a short relative time range (e.g., last 24 hours) and sort the table by upload date.
- Tag logs for a test run: Select a log, open the details sidebar, and add labels that describe the test or scenario.
- Archive a log locally: Use the Download action to save a copy before deleting it from the system.