Assign devices to a site
This page explains how to assign devices to a site. It focuses on the day-to-day tasks you (as an operator or administrator) will perform when linking devices to an existing site. If you need to learn what a site is or how to create one, see the Sites overview and Create a site pages. What you’ll learn on this page:- How device-site assignment works conceptually
- Single-device assignment and removal
- Bulk assign and bulk unassign workflows
- Permission considerations and common edge cases
- Best practices and troubleshooting tips
How assignment works
A site is a logical grouping used to organize devices by location, function or ownership. Assigning a device to a site updates the device’s metadata so it appears within the site’s device list and inherits site-level configuration, monitoring and access policies where applicable. Key points:- Assignment changes only the device’s site reference — it does not modify device firmware, network settings, or remove any device-specific data.
- A device may only be assigned to one site at a time.
- Site-level alerts, dashboards, and reporting typically surface devices assigned to that site.
Assign a single device to a site
- Open the Devices view in the main navigation.
- Locate the device you want to assign. Use the search box to filter by name, type, or status.
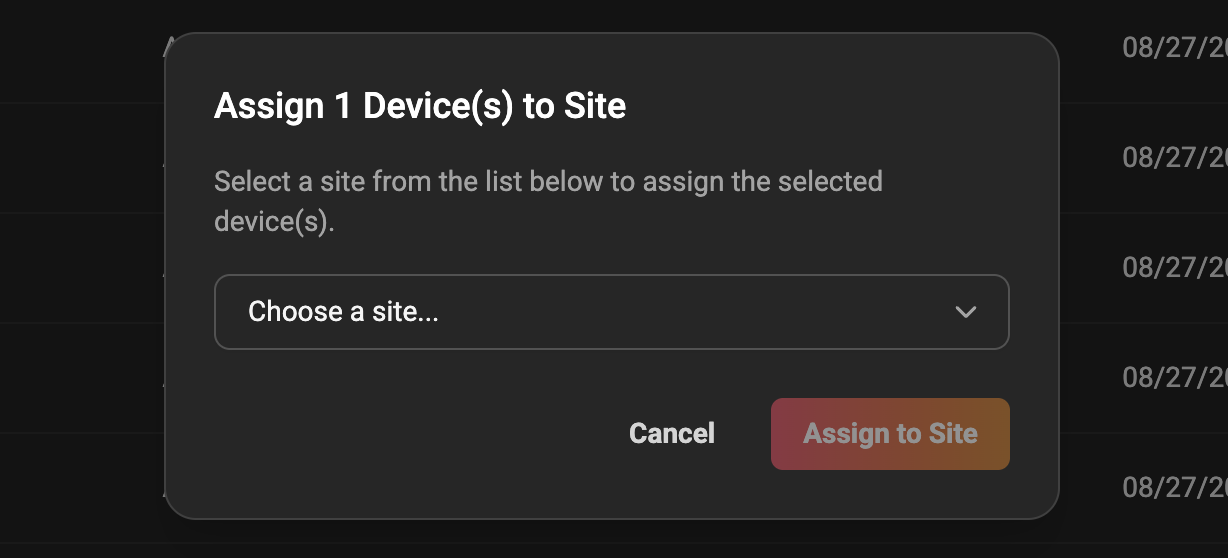
- Click the three-dots menu on the device row and select “Assign to site”.

- In the site picker, select the target site from the dropdown or type to search.
- Click Save or Confirm.
Move a device from one site to another
If a device is already assigned to Site A and you want to move it to Site B, follow the same steps above. The site picker will usually indicate the current site. When you save, the device is removed from Site A’s device list and added to Site B’s list. Important: check for site-specific configurations.Bulk assign devices to a site
Use bulk assignment to save time when you need to assign tens or hundreds of devices to the same site. Steps:- Open the Devices view and use filters to narrow the device list (for example by model, or status).
- Use the checkbox in the table header to select devices on the current page. You can also use the row checkboxes to selectively pick devices.
- If your UI supports it, click “Select all X results” to include devices across multiple pages.
- Click the Bulk actions menu and choose “Assign to site”.
- In the dialog, pick the destination site and confirm.
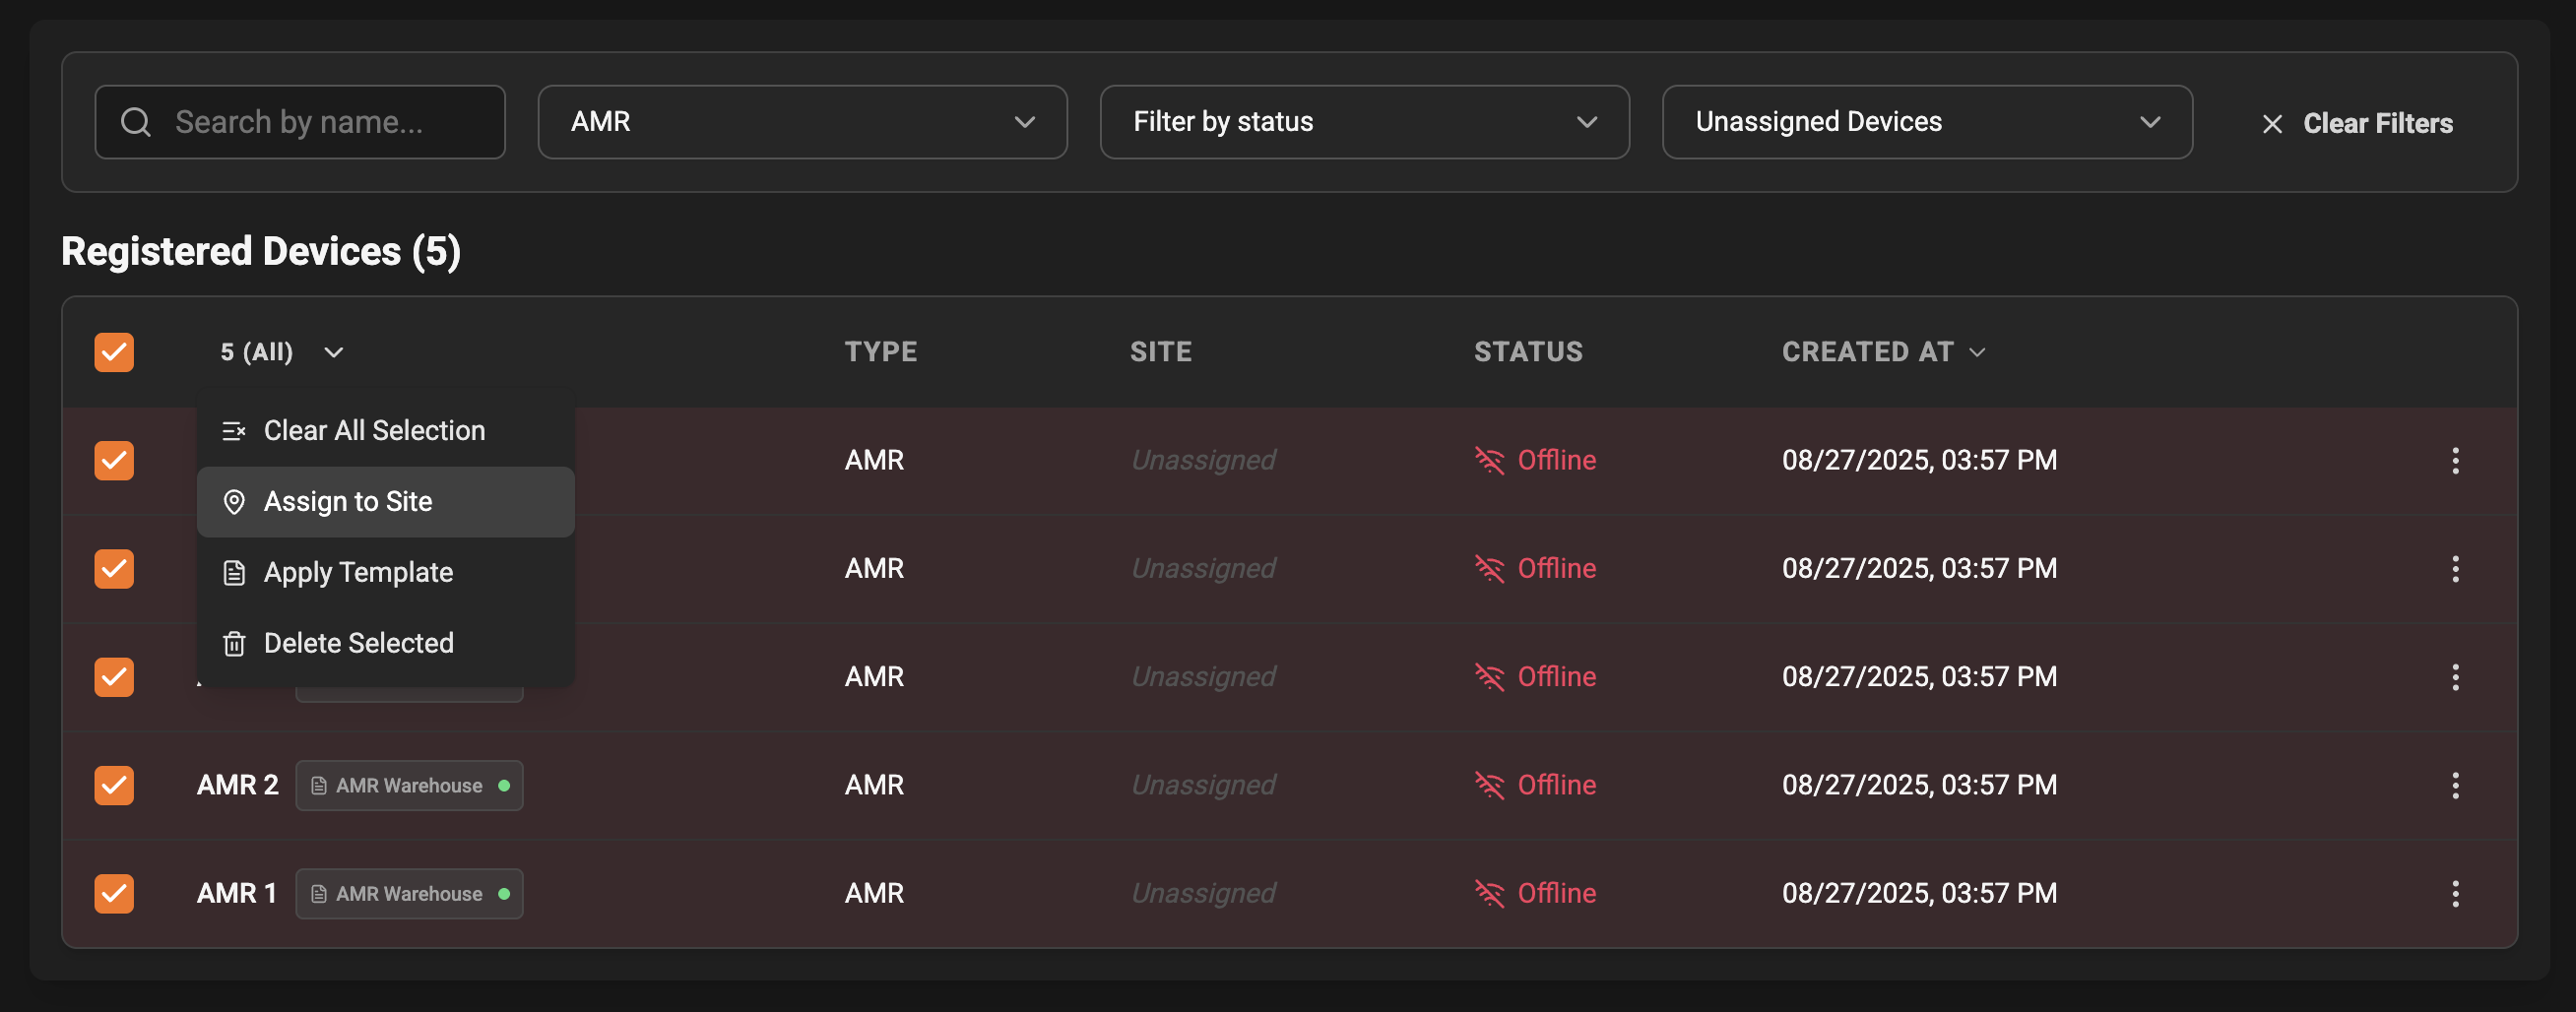
- The system should show a confirmation modal summarizing the action (e.g., “Assign 124 devices to Site Acme HQ?”).
- Devices already assigned to other sites will usually be moved.
Bulk unassign (remove devices from a site)
To remove devices from a site (set their site to “Unassigned”):- Go to the Devices page.
- Select the devices you want to unassign.
- Choose Bulk actions → Unassign from site. Confirm the action in the modal.
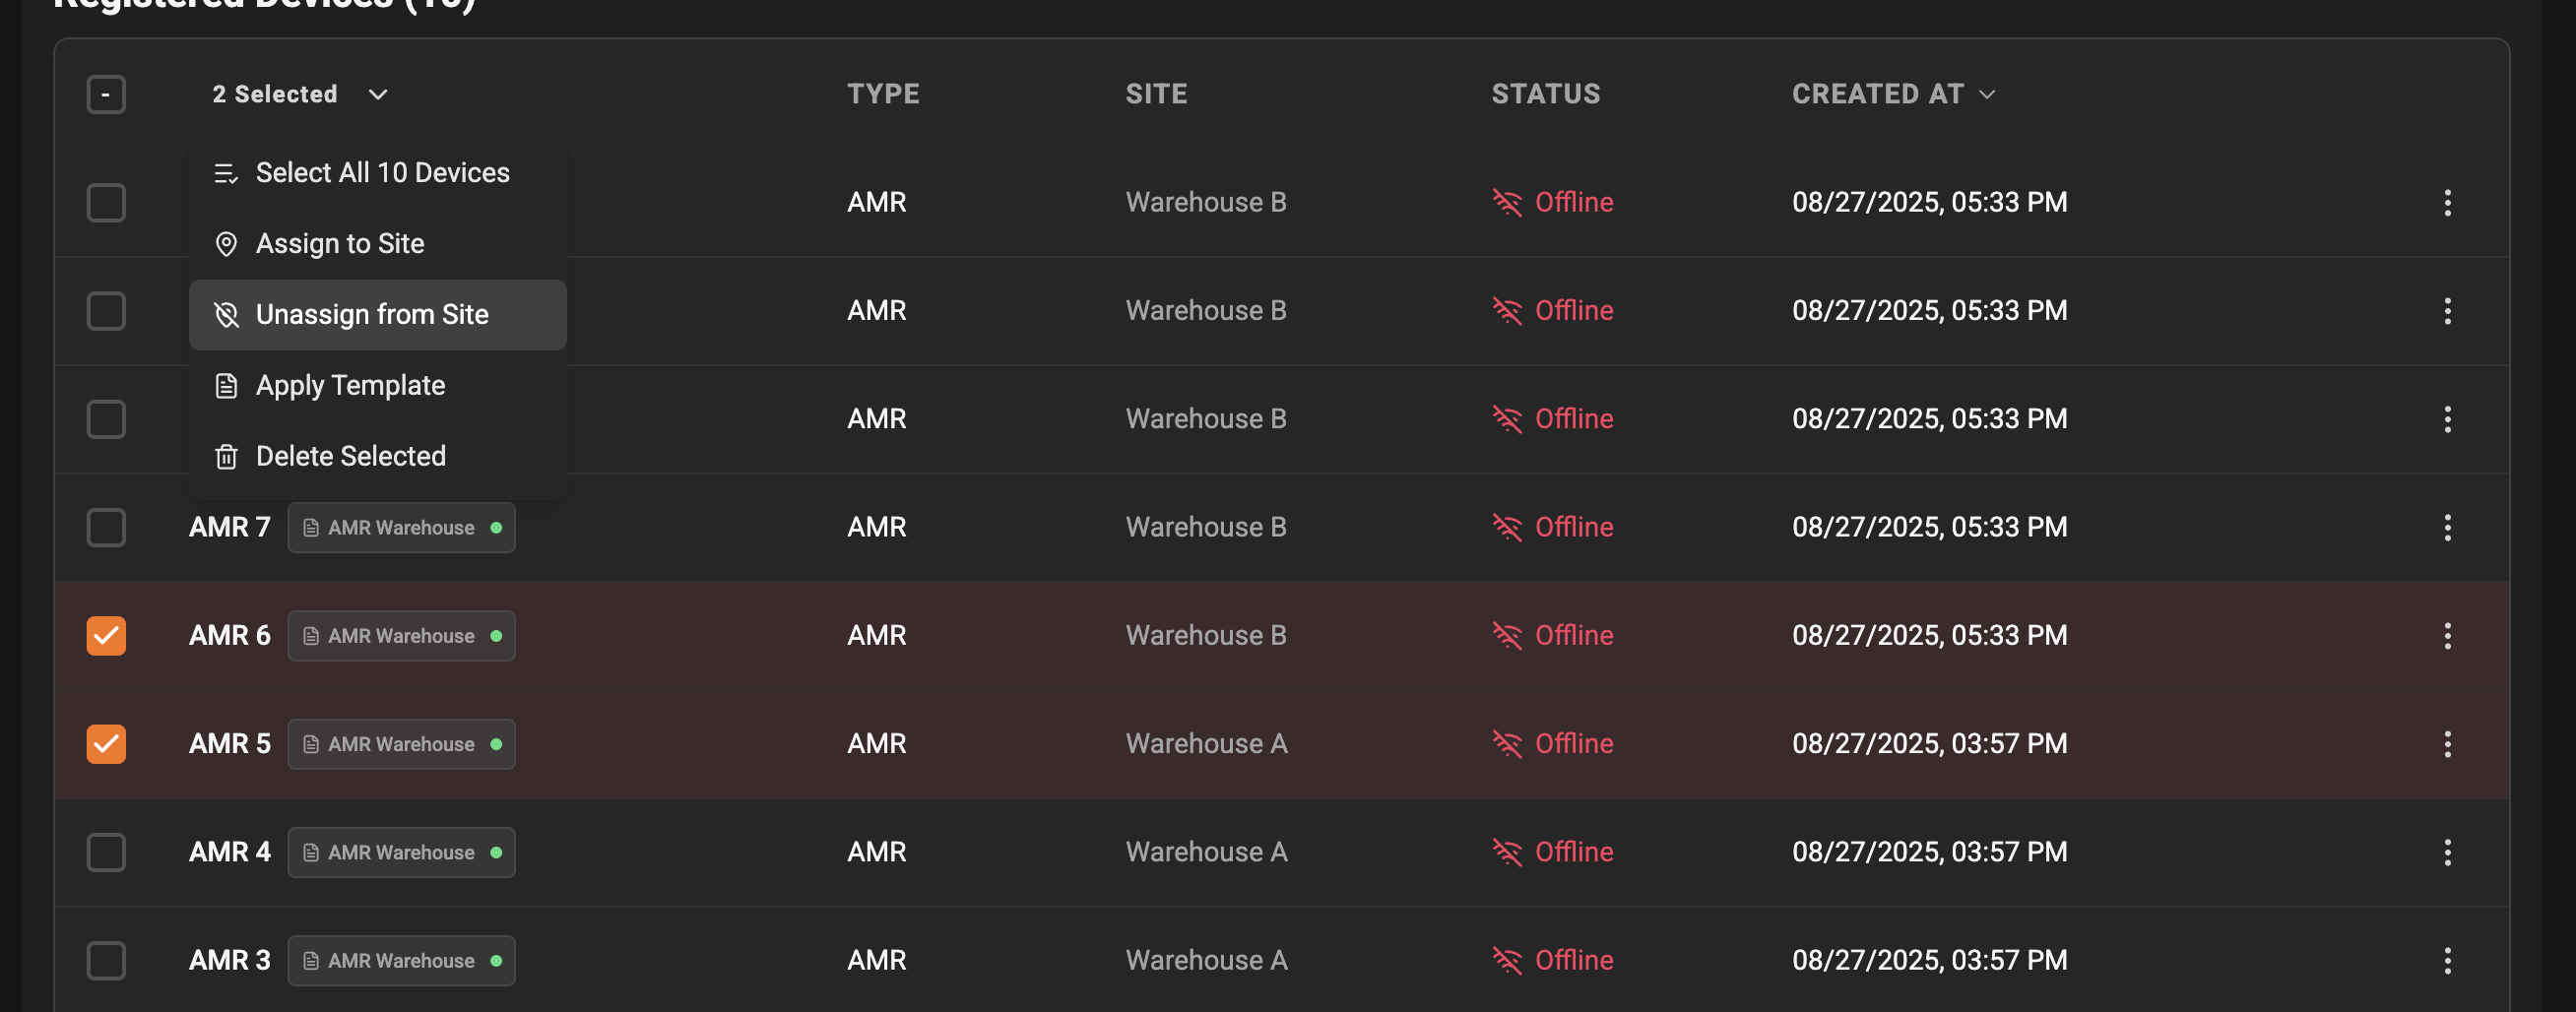
- Unassigning sets the device’s site reference to empty; the device will no longer appear in site-specific dashboards or alerts.
- If you need to reassign the device later, follow the assign flows above.
Best practices
- When moving devices between sites, perform a small test (2-5 devices) first to verify there are no unexpected side-effects.
- Use descriptive site names and keep a clean site hierarchy to avoid mistakes during assignment.