Overview
The User Management page lets you see and manage everyone who has access to your organization. From here you can:- View a list of current members and their roles.
- Invite new people to join the organization.
- See and manage pending invitations.
- Change the role of one or many members.
- Remove members from the organization.
Members
The Members tab shows all users who currently belong to your organization. For each member you can see their name, email, and role.- Select one or more members using the checkboxes to perform bulk actions (change role or remove).
- Use the Actions menu on each row to change a single member’s role or remove them.
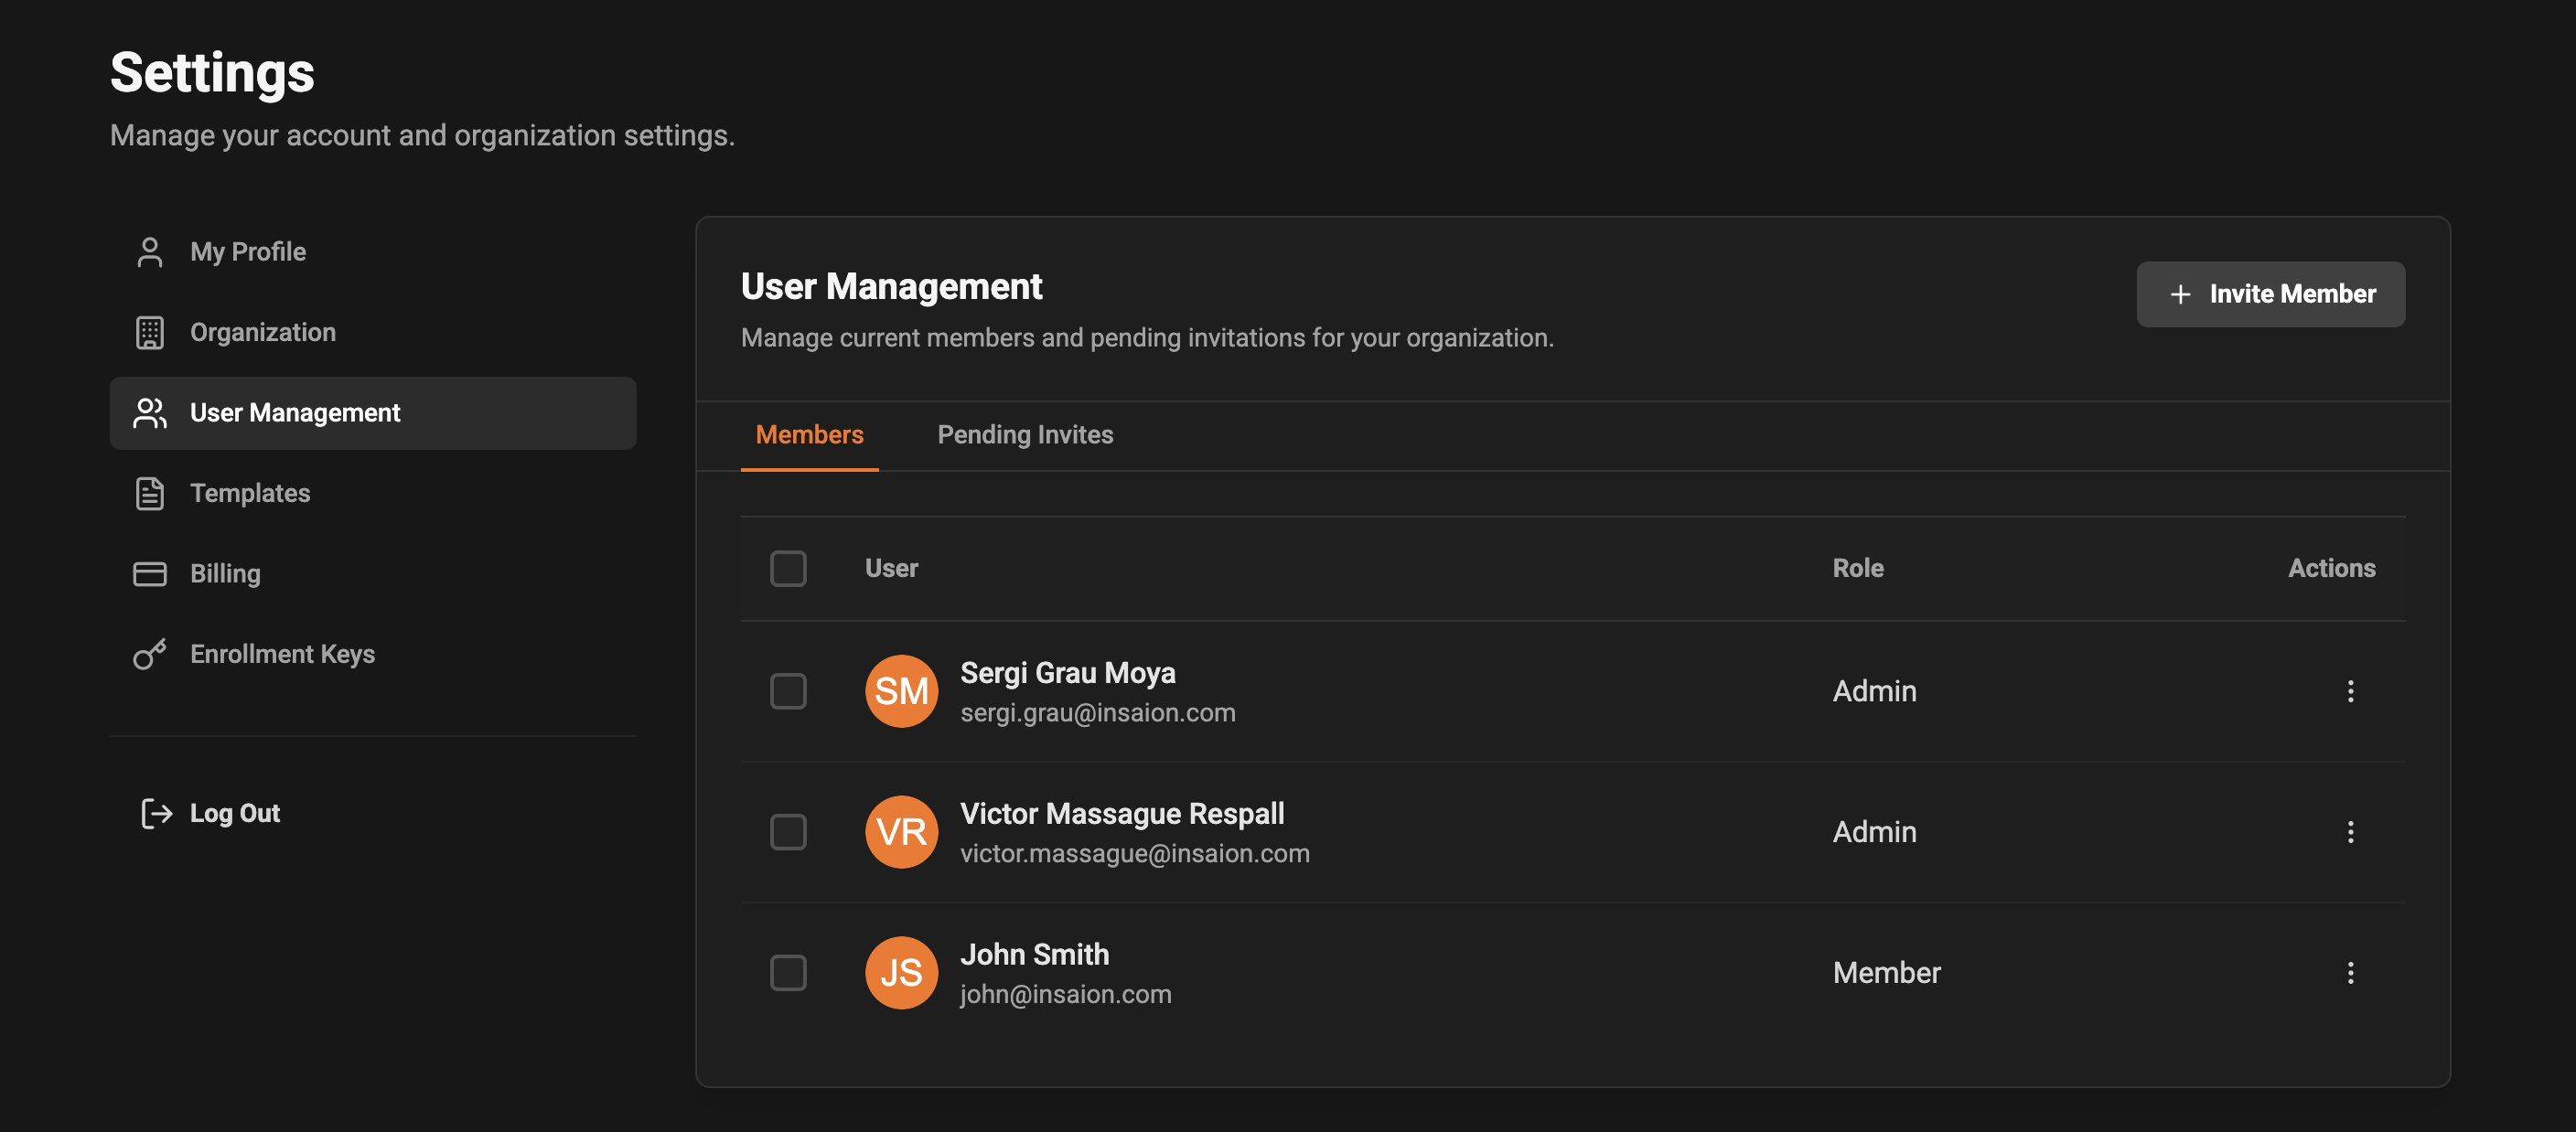
- Quick look at roles — the Role column shows the role assigned to each user (for example: Owner, Admin, Member).
- Bulk selection — check the top-left checkbox to select all visible members and then use the bulk actions menu to change roles or remove users in one go.
Pending Invites
The Pending Invites tab lists all invitations you’ve sent but that haven’t been accepted yet.- Each invite shows the recipient email, the role they were invited to, when the invite was sent, and its current status (for example: pending or expired).
- Use the Actions menu next to an invite to resend it or revoke it.
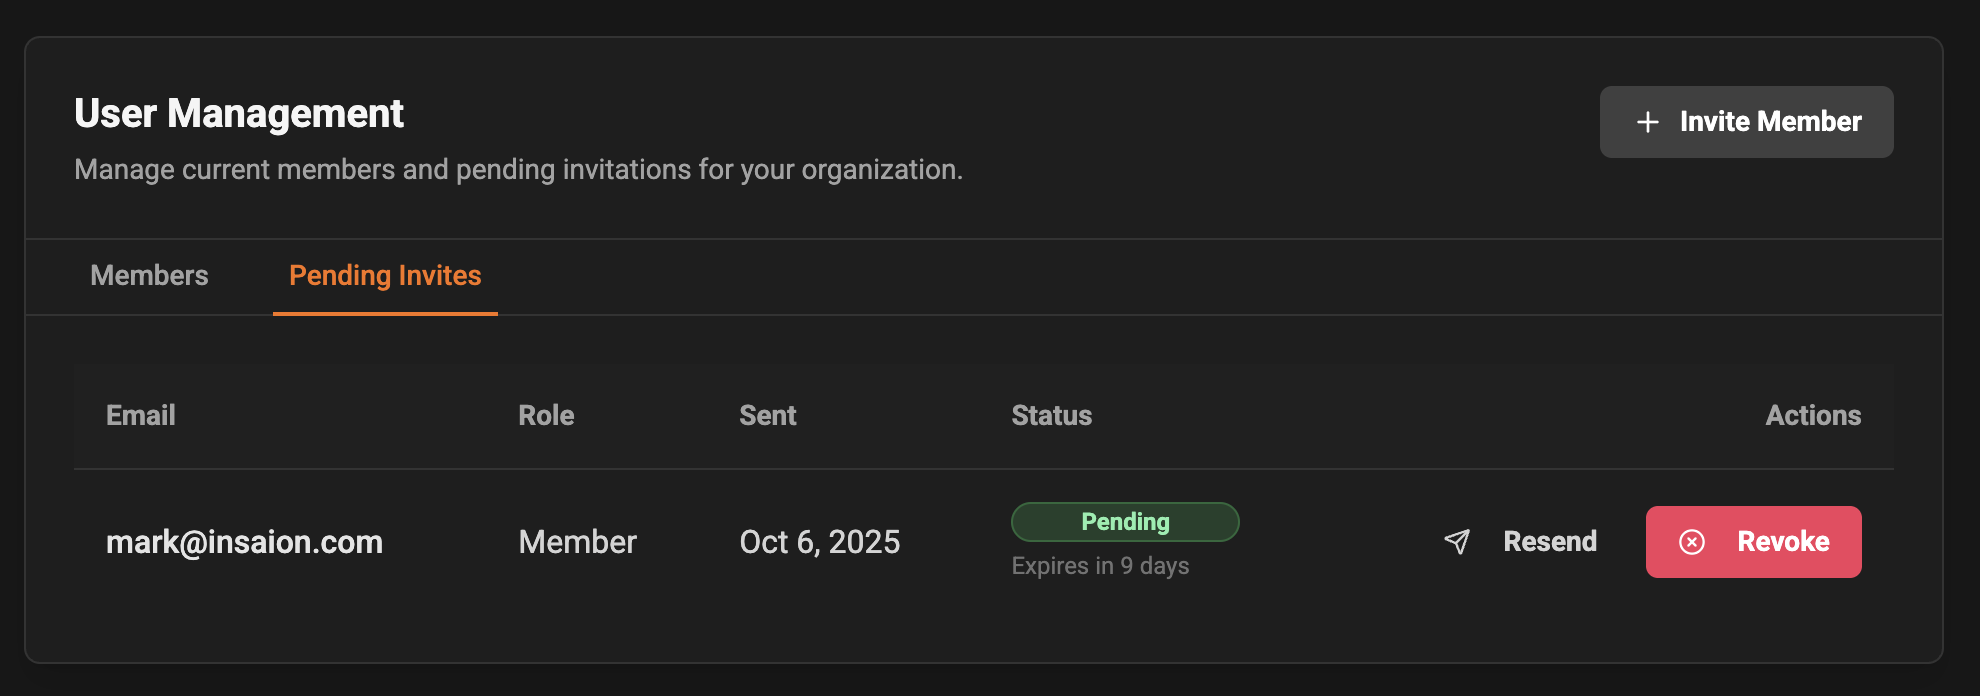
- Resend an invite if the invited person didn’t receive the email or needs a fresh reminder.
- Revoke an invite if it was sent to the wrong address or is no longer needed.
Invite a New Member
Click the “Invite Member” button to open the invite dialog. You will be asked for the new person’s email and the role you’d like them to have.- Enter a valid email address and choose a role from the Role dropdown.
- Press “Send Invite” to send an invitation email. The new invite will appear under Pending Invites until the recipient accepts it.

- By default a common role (for example “Member”) will be selected to make inviting faster.
- If you make a mistake while entering the email, simply cancel and try again; no invite is sent until you press “Send Invite”.
Change Role
You can change a member’s role at any time. Open the Actions menu for a user and select “Change Role” to pick a new role.- You can change the role for a single user or use the top checkboxes to select multiple users and change roles in bulk.
- After changing roles, affected users will see the permissions and access associated with their new role the next time they use the app.
- Think about the permissions you want someone to have before changing their role.
- Bulk role changes are useful when reorganizing teams or updating access levels for a group of people.
Remove Members
To remove a user, select them and choose the Remove action (either from the row Actions menu or from the bulk actions menu).- A confirmation dialog will appear to make sure you want to remove the selected member(s).
- Once removed, the user will immediately lose access to your organization.
Accessibility & Safety
- Important actions like removing a member or revoking an invite require confirmation so changes aren’t made accidentally.
- If you need help with membership or invites, contact your organization owner or the support team.
FAQ
- Q: What if an invited user doesn’t receive the email?
- A: Try resending the invite from the Pending Invites tab. Also ask the recipient to check spam/junk folders.
- Q: Can I change a role back after I update it?
- A: Yes — just open the Change Role dialog again and pick a different role.