

- Timelines: one row per robot, showing what it has recorded over time.
- Uploaded: every recording in the cloud, from robots and from manual uploads.
- Fleet settings: recording settings applied to many robots at once.
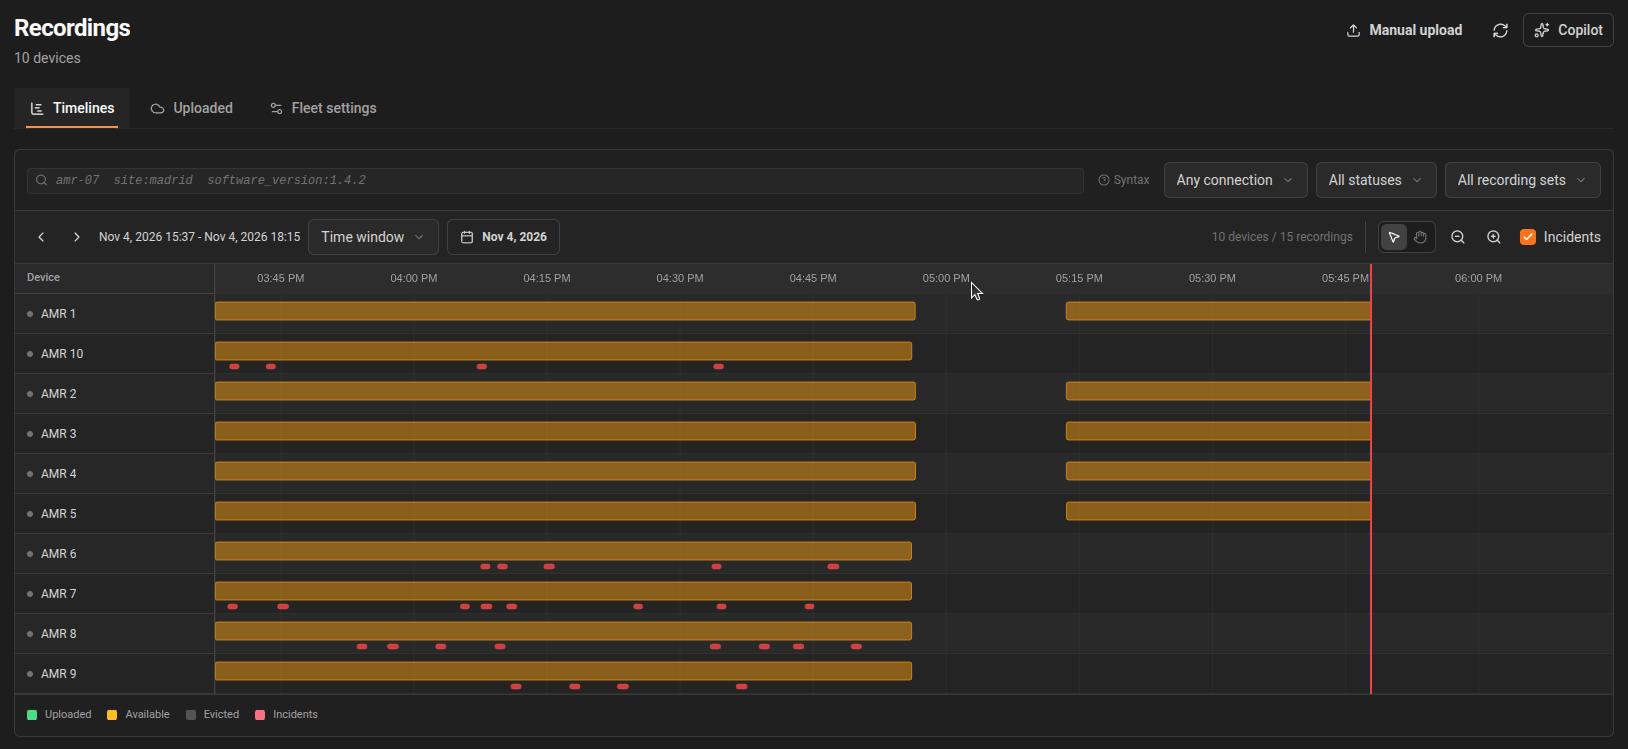
Search and filters
One search bar filters every tab:- Plain words search the device name, ID and site, and for manual uploads their name and tags.
key:valueconditions match device tags as they were when each recording started, for examplesite:madrid software_version:1.4.2. A robot upgraded on Tuesday matches1.4.1for its earlier recordings and1.4.2for later ones. Manual uploads match their own tags and the device tags saved with them.- Built-in conditions such as
site,nameandtypenarrow the fleet straight away. Devices without matching recordings leave the timeline.
- Device status: Any connection, Online or Offline.
- Recording status: All statuses, Uploaded, Upload pending, Available locally or Evicted locally.
- Recording set: one recording set (pipeline), or all of them.
Timelines
Each row is one robot, and each block a recording session:- Choose a Time window (last hour, 6 hours, 24 hours or 7 days), step back and forward with the arrows, or jump to a date with the calendar.
- Switch between Select recordings and Pan timeline, and use the zoom buttons to change the span. All rows stay on the same time axis.
- Click a recording for its details and upload options, as on the device’s own timeline. See Upload a time window.
Uploaded
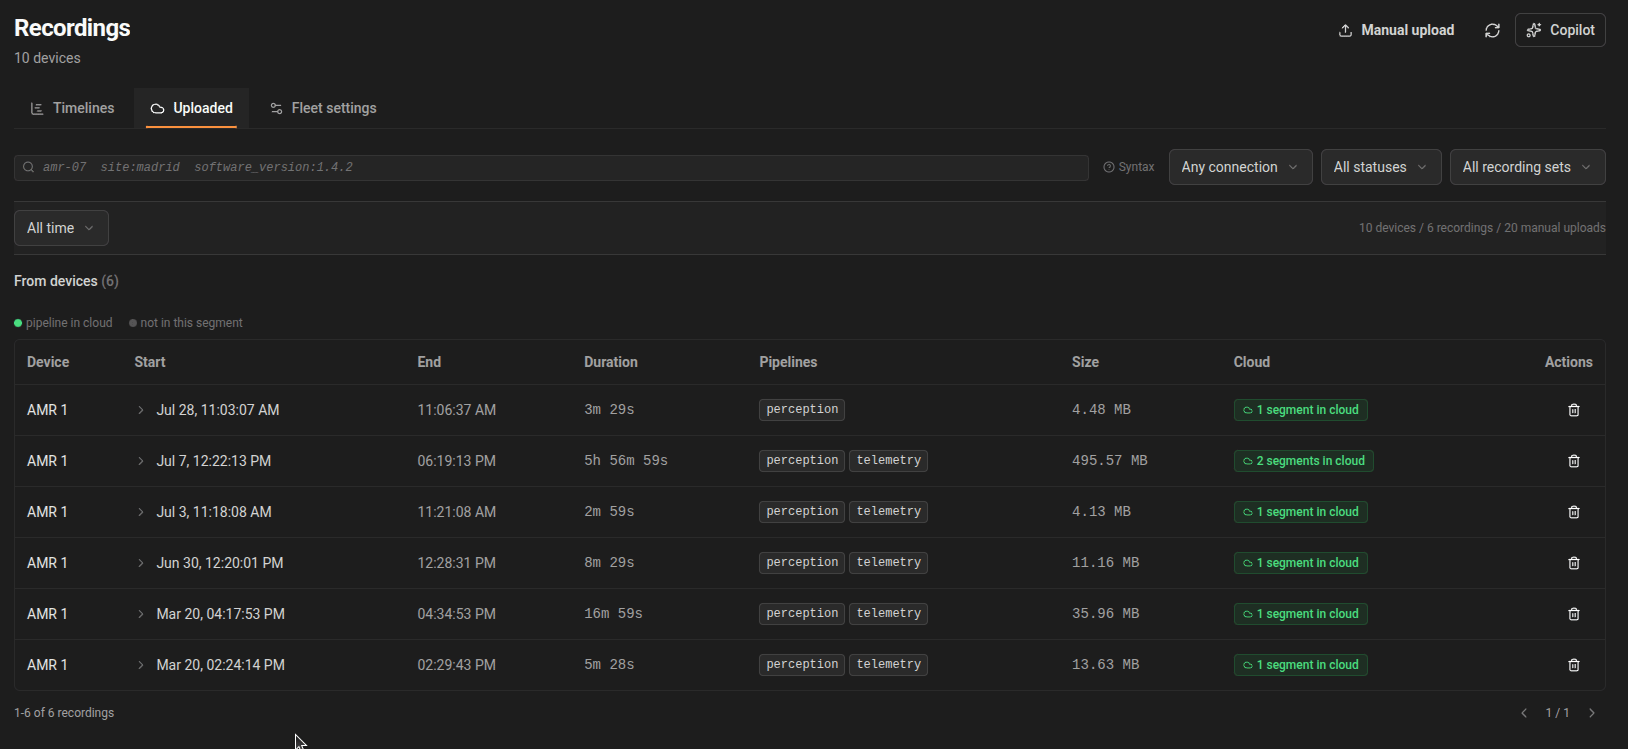
The Uploaded tab shows what is stored in the cloud. Use Uploaded time range to show everything (All time) or only what falls inside the timeline’s range (Timeline range). Robot recordings come first, in the same grouped list as a device’s Recordings tab: expand a recording to see its segments in the cloud, and open them in the visualizer. See Recordings list for details. Below them, the Manual uploads section lists files uploaded by hand. Each row shows:- Device: the device the file is linked to, or Unassigned.
- Name, Start, Duration, Uploaded and Size.
- Labels: the upload’s
key:valuetags. - Actions: View in Lichtblick, Download the MCAP file, or Delete upload (you are asked to confirm).
Upload details
Click a manual upload to open Upload details:- Read-only: ID, Start Time, End Time, Duration and Uploaded.
- Assigned Device: link a manual upload to a device, or leave it Unassigned.
- Name (required) and Description.
- Tags: type a tag such as
scenario:dockingand press Enter or Add. Click a tag to edit it, or remove it with its ×. Keys use lowercase letters, digits and_ . / -and start with a letter. - Device tags at recording time: for an upload linked to a device, the device’s tags when the recording started. Read-only.
Manual upload
Click Manual upload in the page header to upload an.mcap file from your computer. It appears under Manual uploads on the Uploaded tab, where you can view, download, tag and link it to a device. Manual uploads need device write permission.
Fleet settings
The Fleet settings tab changes recording settings on many robots at once. It applies to the robots that match the search bar, so filter first, then set any of:- Recording: Enabled or Disabled.
- Retention policy: FIFO, HARD or Unlimited.
- Buffer size (GB).
- Split duration (seconds).
Common workflows
- Find recordings from a release: search
software_version:1.4.2on the Timelines tab to see what robots recorded while they ran that version. - Tag a test run: open a manual upload on the Uploaded tab and add tags such as
scenario:dockingandtest_run:42, then search for them later. - Keep a copy: use Download to save the MCAP file before deleting it from the cloud.